Recent Questions Struts Collapse Tree Table
Q: I have to find out, how the tree view navigation is NOT expanding in the beginning..
A: You should set the following parameter:
var texpanded=0;
Use + signs before items text to expand the some items:
["+Land","", "", "", "", "", "", "0", "", "", ],
Q: We are in the stage of design, we have a requirement to have the right click drop down menu fly out from right to left.
A: The following parameter controls the ways of showing submenus:
From left to right:
var subMenuAlign="left";
var subMenuVAlign="top";
From left to right + upwards:
var subMenuAlign="left";
var subMenuVAlign="bottom";
From right to left:
var subMenuAlign="right";
var subMenuVAlign="top";
From right to left + upwards:
var subMenuAlign="right";
var subMenuVAlign="bottom";
You can find this info here:
http://deluxe-menu.com/ways-showing-submenus-sample.html
Q: I hope you have a instructions so we can install css menu in our website.
A: Unfortunately we don't have step by step tutorial yet.
We'll try to create it in the nearest time.
1. Create your Css menu in Deluxe Tuner.
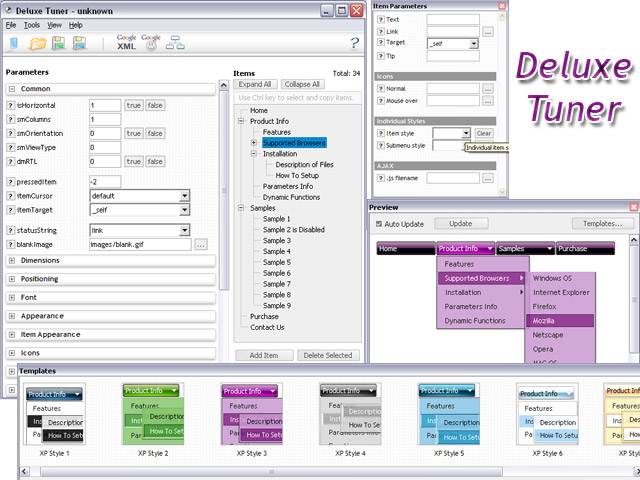
When you open Deluxe Tuner you can click "File/New" and add items
and subitems using buttons "Add Item" and "Add Subitem" on the main window.
See the parameters for the menu on the main window.
More info about menu parameters you can find on our site
http://deluxe-menu.com/css-menu/parameters-info.html
2. You should install the menu on your page.
You can click, for example, File->Save Css Menu/Export HTML
So, you'll have folder with images and .css file ("deluxe-css-menu.files/" folder by default),
deluxe-css-menu.html file and deluxe-css-menu.js file with all menu parameters
(project file you need, if you want to modify your menu later,
there is no need to upload deluxe-css-menu.js on your server).
Open deluxe-css-menu.html file in any text editor and copy several rows of
code into your page (for example index.html page of your website).
Copy and paste several rows into your html page (index.html).
<head>
...
<link type="text/css" href="deluxe-css-menu.files/style.css" rel="stylesheet">
...
</head>
<body>
...
<!-- Deluxe Css Menu -->
<ul id="cssMenu">
<li><a href="testlink.html">Home</a></li>
<li><a href="#"><span>
<img class="def" src="deluxe-css-menu.files/icon1.gif"/>
<img class="over" src="deluxe-css-menu.files/icon1o.gif">Product Info</span>
<![if gt IE 6]></a><![endif]><!--[if lte IE 6]><table><tr><td><![endif]-->
<ul style="width:161px;">
....
</ul>
<!-- (c) 2009, Deluxe-Menu.com -->
...
</body>
You should also copy "deluxe-menu.files/" folder with all images and .css file
into the same folder with your index.html page.
More info about installation:
http://deluxe-menu.com/css-menu/installation-info.html
Try that.Q: I did not see how you get the content of link value of the tab to display below css tab menu.
The closet I got was to click a tab and havea second window open up wit the content of the link.
A: See in Deluxe Tabs there are two modes:
1. var tabMode=0;
You can create only one level of tabs and assign Object Id's of the
DIV's to show when you click on the tab.
["XP Tab 1","content1", "", "", "", "", "", "", "", ],
["XP Tab 2","content2", "", "", "", "", "", "", "", ],
["XP Tab 3","content3", "", "", "", "", "", "", "", ],
["XP Tab 4","content4", "", "", "", "", "", "", "", ],
2. var tabMode=1;
You can assign only links in this mode.
You should create top level items with subitems.
["XP Tab 1","", "", "", "", "", "", "", "", ],
["|Link 1_1","http://deluxe-tabs.com", "", "", "", "", "0", "", "", ],
["|Link 1_2","testlink.htm", "", "", "", "", "0", "", "", ],
["|Link 1_3","testlink.htm", "", "", "", "", "0", "", "", ],
["|Link 1_4","testlink.htm", "", "", "", "", "0", "", "", ],
["|Link 1_5","testlink.htm", "", "", "", "", "0", "", "", ],
["XP Tab 2","", "", "", "", "", "", "", "", ],
["|Link 2_1","testlink.htm", "", "", "", "", "0", "", "", ],
["|Link 2_2","testlink.htm", "", "", "", "", "0", "", "", ],
["|Link 2_3","testlink.htm", "", "", "", "", "0", "", "", ],
["|Link 2_4","testlink.htm", "", "", "", "", "0", "", "", ],
["|Link 2_5","testlink.htm", "", "", "", "", "0", "", "", ],
["XP Tab 3","", "", "", "", "", "", "", "", ],
["|Link 3_1","testlink.htm", "", "", "", "", "0", "", "", ],
["|Link 3_2","testlink.htm", "", "", "", "", "0", "", "", ],
["|Link 3_3","testlink.htm", "", "", "", "", "0", "", "", ],
["|Link 3_4","testlink.htm", "", "", "", "", "0", "", "", ],
["|Link 3_5","testlink.htm", "", "", "", "", "0", "", "", ],
You can use Object ID as well as Link in both modes. Use the following prefixes within item's link field:
"object:" - means that there is object id after it;
"link:" - means that there is a link after it.
"javascript:" - means that there is a javascript code after it, for example:javascript:alert(\'Hello!\')
So, you should write for example:
["|Link 1_1","object:Content1_1", "", "", "", "", "0", "", "", ],