Recent Questions H1 Included In Moset Tree
Q: We are actually very happy with the product compared to the other options available. The code is cleaner and it is easy to use. We would actually like to continue to use your product but our client uses firefox most of the time and if the javascript onmouseover menu won't go over the java applet it isn't going to work. You mention that you will try to fixthe issue. If you can give me a date to when it would be fixed by, I can try to convince our client to wait.
Please let me know as soon as possible.
A: Actually JavaScript Tree Menu v3.2.5 overlap applets in Firefox.
See the attached example.
You should set
var useIFRAME=1;
parameter.
Q: I've purchased the mac style tabs. I've spent countless hours trying to get it to work, no luck so far. I've gotten jscript tabs to look okay on page, but links between pages do not work. I've even gotten them to work, but they were simple text menu's; not jscript tabs. But I haven't gotten the tabbed menu to work. Checked and tripled cheeked the instructions, still no luck.
I've uploaded the files to a test server.
There are four files cameron,carl,grace, and chantel; these are simple identical two column pages to test the links between tabs. NO LUCK. I'm about to give up on your program, can you please help.
A: You're using
var tabMode=0;
now. That means that you should use content DIV's ID instead of thelink.
If you want to open links you should write links in the following way:
["Cameron","link:cameron.html", "", "", "", "", "", "", "", ],
["Grace","link:grace.html", "", "", "", "", "", "", "", ],
["Carl","link:carl.html", "", "", "", "", "", "", "", ],
["Chantel","link:chantel.html", "", "", "", "", "", "", "", ],
Q: We just bought your product suite including deluxe tabs control. For some reason that the tabs onload is not working in IE 7 only. It works in IE 6 and FF, Chrome and Safari. Attached is the sample page which will show the problem. I also attached our receipt of order for your reference.
Pleae help me to figure out what is the problem with my code ASAP.
A: Try to set exact height for your content DIV. Change height:0%; to height:200px;
<div id="content1" style="height: 200px; visibility: hidden;" class="tabPage">
<div id="content1" style="height:0%; visibility: hidden;" class="tabPage">
Q: I am unable to make content show for each tab in the dhtml tab navigation.
I can make it open a new webpage, but that isnt what I want.
What I want is when the visitor clicks a tab, then content for
that tab shows, on the same page, and the tab menu still there.
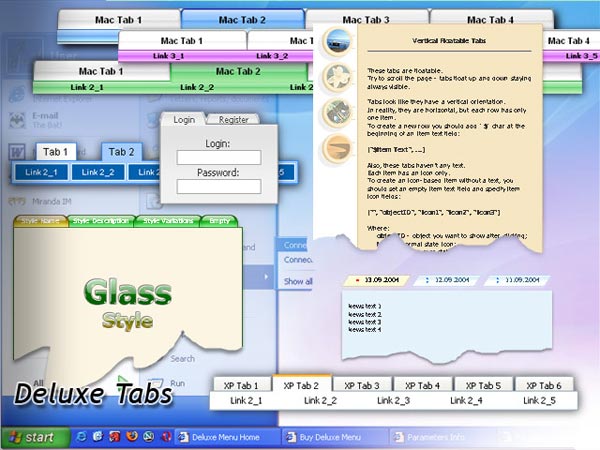
A: See in Deluxe Tabs there are two modes:
1. var tabMode=0;
You can create only one level of tabs and assign Object Id's of the
DIV's to show when you click on the tab.
["XP Tab 1","content1", "", "", "", "", "", "", "", ],
["XP Tab 2","content2", "", "", "", "", "", "", "", ],
["XP Tab 3","content3", "", "", "", "", "", "", "", ],
["XP Tab 4","content4", "", "", "", "", "", "", "", ],
2. var tabMode=1;
You can assign only links in this mode.
You should create top level items with subitems.
["XP Tab 1","", "", "", "", "", "", "", "", ],
["|Link 1_1","http://deluxe-tabs.com", "", "", "", "", "0", "", "", ],
["|Link 1_2","testlink.htm", "", "", "", "", "0", "", "", ],
["|Link 1_3","testlink.htm", "", "", "", "", "0", "", "", ],
["|Link 1_4","testlink.htm", "", "", "", "", "0", "", "", ],
["|Link 1_5","testlink.htm", "", "", "", "", "0", "", "", ],
["XP Tab 2","", "", "", "", "", "", "", "", ],
["|Link 2_1","testlink.htm", "", "", "", "", "0", "", "", ],
["|Link 2_2","testlink.htm", "", "", "", "", "0", "", "", ],
["|Link 2_3","testlink.htm", "", "", "", "", "0", "", "", ],
["|Link 2_4","testlink.htm", "", "", "", "", "0", "", "", ],
["|Link 2_5","testlink.htm", "", "", "", "", "0", "", "", ],
["XP Tab 3","", "", "", "", "", "", "", "", ],
["|Link 3_1","testlink.htm", "", "", "", "", "0", "", "", ],
["|Link 3_2","testlink.htm", "", "", "", "", "0", "", "", ],
["|Link 3_3","testlink.htm", "", "", "", "", "0", "", "", ],
["|Link 3_4","testlink.htm", "", "", "", "", "0", "", "", ],
["|Link 3_5","testlink.htm", "", "", "", "", "0", "", "", ],
You can use Object ID as well as Link in both modes. Use the following prefixes within item's link field:
"object:" - means that there is object id after it;
"link:" - means that there is a link after it.
"javascript:" - means that there is a javascript code after it, for example:javascript:alert(\'Hello!\')
So, you should write for example:
["|Link 1_1","object:Content1_1", "", "", "", "", "0", "", "", ],

