Recent Questions Tree Css Menu
Q: I have created a menu for a product tutorial. It consists of about 50 topics, each of which is listed in my menu. I’m wondering if there is a way to gray out the menu link for the open tutorial topic?
A: Unfortunately, JavaScript Tree Menu doesn't have such a feature.
You should write your own code, for example, on PHP.
You can try to use the following function
function disable() {
dm_ext_changeItem(1, 1, 1, ["", "", "", "", "", "_"]);
}
to disable your items.
The example you can find on our site
http://www.deluxe-menu.com/dynamic-functions-sample.html
Please, see the source code.
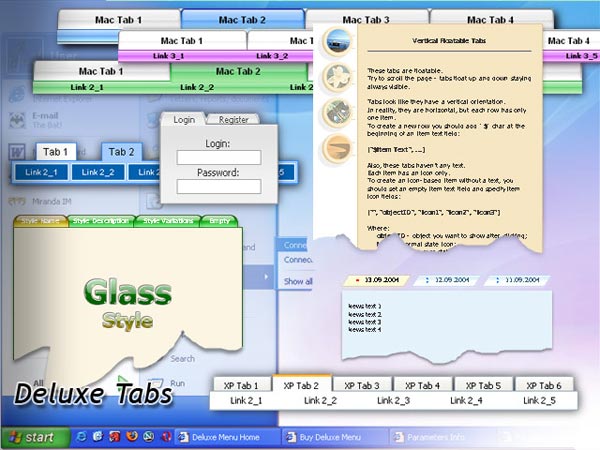
Q: I have read your FAQ’s on “When using mouse over tab menu, where do I place the text content related to the selected tab”, but I am still not understanding how to edit the script.
Cansomeone please assist me.
A: You should specify any Object ID name of the DIV.
See, for each item you should assign the ID property of the content
DIV (see data file with your menu parameters).
["Style Name","contentName", "", "", "", "", "1", "", "", ],
["-","", "", "", "", "", "0", "", "", ],
["Style Description","contentDescription", "", "", "", "", "", "", "", ],
["-","", "", "", "", "", "0", "", "", ],
["Style Variations","contentVariations", "", "", "", "", "", "", "", ],
["-","", "", "", "", "", "0", "", "", ],
["Empty","", "", "", "", "", "2", "", "", ],
And on your html page you should create DIV's with such ID.
You canset background image for these DIV's in styles.
<div id="contentName" style="height: 0%; visibility: hidden; background-image: url('img/back.jpg'); background-repeat:repeat-y;" class="tabPage">
<p align=center><img src="img/style01_title.gif" width=140 height=90 alt="Glass Style Tabs"></p>
You should paste your content here!!!!!
</div>
<div id="contentDescription" style="height: 0%; visibility: hidden;" class="tabPage">
<p align=center><img src="img/style01_title.gif" width=140 height=90 alt="Glass Style Tabs"></p>
You should paste your description here!!!!!
</div>
Q: I'd like to be able to right click on items in a collapsible menu and then pick actions to perform from a context menu
Is this possible?
A: You can use API functions
function dtreet_ext_userRightClick (itemID)
See more info here:
http://www.deluxe-tree.com/functions-info.html
Q: I am trying to create a tab menu and I have some questions. I want a tab menu that has four tabs. Each tab is a different image, the normal and hover state uses the same image and the selected state uses a different image. This will be applied to all four tabs. All the tabs will not have any text on them because the image will already have text on it. This tab menu will not have a submenu but will use <div id> tags to populate information when a certain javascript menu master tab is selected.
I am having difficulty trying to create this type of tab menu to work with the Deluxe Tuner. Each time I try to make an image as a tab that image is applied to all javascript menu master tabs which I do not want. I want each tab to have a different image.
Please advice how I can do this.
A: If you want to use different images you should use Individual ItemStyles and assign them for your tabs.
var bstyles = [
["bitemBackImage=deluxe-tabs.files/style04_n_back.gif,deluxe-tabs.files/style04_s_back.gif, deluxe-tabs.files/style04_s_back.gif","bbeforeItemImage=deluxe-tabs.files/style04_n_left.gif, deluxe-tabs.files/style04_s_left.gif,deluxe-tabs.files/style04_s_left.gif", "bafterItemImage=deluxe-tabs.files/style04_n_right.gif, deluxe-tabs.files/style04_s_right.gif,deluxe-tabs.files/style04_s_right.gif"],
["bitemBackImage=deluxe-tabs.files/style04_2_n_back.gif,deluxe-tabs.files/style04_2_s_back.gif, deluxe-tabs.files/style04_2_s_back.gif","bbeforeItemImage=deluxe-tabs.files/style04_2_n_left.gif, deluxe-tabs.files/style04_2_s_left.gif,deluxe-tabs.files/style04_2_s_left.gif", "bafterItemImage=deluxe-tabs.files/style04_2_n_right.gif, deluxe-tabs.files/style04_2_s_right.gif,deluxe-tabs.files/style04_2_s_right.gif"],
["bitemBackImage=deluxe-tabs.files/style04_3_n_back.gif,deluxe-tabs.files/style04_3_s_back.gif, deluxe-tabs.files/style04_3_s_back.gif","bbeforeItemImage=deluxe-tabs.files/style04_3_n_left.gif, deluxe-tabs.files/style04_3_s_left.gif,deluxe-tabs.files/style04_3_s_left.gif", "bafterItemImage=deluxe-tabs.files/style04_3_n_right.gif, deluxe-tabs.files/style04_3_s_right.gif,deluxe-tabs.files/style04_3_s_right.gif"],
];
var bmenuItems = [
["Item 1","", "", "", "", "", "0", "", "", ], //style1
["Item 2","", "", "", "", "", "1", "", "", ], //style2
["Item 3","", "", "", "", "", "2", "", "", ], //style3
];