Recent Questions Css Tree Menu
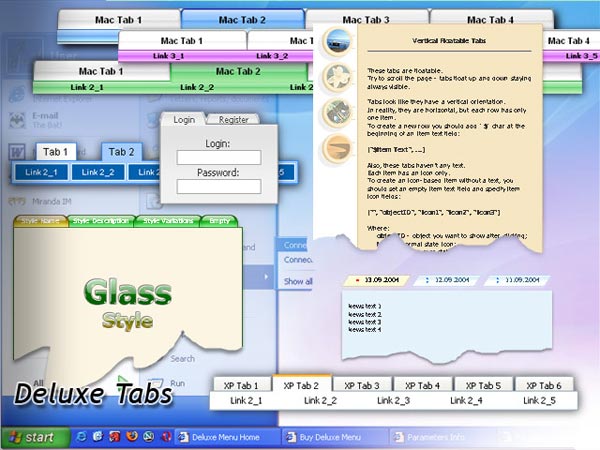
Q: I'd like to create a tabbed menu which has about 9 or 10 main tabs.
I'd like to conserve the horizontal space, and wrap the menu after 4 or 5 tabs to have two rows of main tabs. Some tabs have sub menus, some don't.
The first main tab has about 10 items, and I'd like the user to be able to click on that main tab to see the 10 items.
I was going along splendidly with tab mode on. Then I get too far to the right and want to wrap.
hence that is why I want two rows, and apparently need to add the $ to wrap the menu around to a second row.
Do I need to use two tab menus to accomplish this?
A: This doesn't work in TabMode=1.
I suppose that it will be better to use two menus on the page.
Q: How do I make the main nav links align left in my horizontal menu (they are center aligned).
A: Try to use the following parameter:
var itemAlignTop="left";
Q: Pls help me with another question.
I have an horizontal menu in which the submenus drop down (as in example # 1 you have in your web).
For the first level items (which are horizontal), I do not want item spacing or itemPadding, that is:
var itemSpacing=0;
var itemPadding=0;
However, for the second and third level menu items, that drop down, I do need spacing and padding, like this:
var itemSpacing=1;
var itemPadding=1;
How can achieve this if, we have only one set of parameters??
Thank you very much and best regards
A: You should use Individual Styles.
You should set the following parameters:
var itemSpacing = 0;
var itemPadding = 0;
and create individual style for submenus
var menuStyles = [
["menuBackImage=images/subm_back.gif","itemSpacing=1","itemPadding=1"], // add Spacing and Padding to the style which is used for the third level menu items.
["columnPerSubmenu=2"],
["itemSpacing=1","itemPadding=1"], //style 2
];
You should assign this style for the second and third level menu items
["DHTML Menus","", "images/icon1.gif", "images/icon1o.gif", , , , , , , , ],
["|The JavaScript Tree Menu","http://deluxe-menu.com",
"images/icon2.gif", "images/icon2o.gif", , , , "2", , , , ], // assign Style 2
["||Features","", "images/icon3.gif", , , , "0", "0", , , , ], // assign Style 0
["|||First Column","", , , , , "0", "1", , , , ],
["|||Second Column","", , , , , "0", , , , , ],
["||Cross-frame Mode","", "images/icon5.gif", "images/icon5o.gif", , , "1", , , , , ],
["||Easy Installation","", "images/icon5.gif", "images/icon5o.gif", , , "1", , , , , ],
["|The Javascript/DHTML Tree","http://deluxe-tree.com", "images/icon2.gif", "images/icon2o.gif", , , , , , , , ],
...
Q: We bought a tab menu javascript licence yesterday and we can't figure out how to implement it into our web site.
A: See in Deluxe Tabs there are two modes:
1. var tabMode=0;
You can create only one level of tabs and assign Object Id's of the
DIV's to show when you click on the tab.
["XP Tab 1","content1", "", "", "", "", "", "", "", ],
["XP Tab 2","content2", "", "", "", "", "", "", "", ],
["XP Tab 3","content3", "", "", "", "", "", "", "", ],
["XP Tab 4","content4", "", "", "", "", "", "", "", ],
You should paste your content in the <div> .. </div> tags.
<div id="content1" style=" visibility: hidden;" class="tabPage">
<p align=center><img src="img/logo_DM.gif" width=262 height=56 alt="Deluxe-Menu.com"></p>
</div>
<div id="content2" style="visibility: hidden;" class="tabPage">
<p align=center><img src="img/logo_DT.gif" width=262 height=56 alt="Deluxe-Tree.com"></p>
</div>
<div id="content3" style=" visibility: hidden;" class="tabPage">
<p align=center><img src="img/logo_DTabs.gif" width=254 height=58 alt="Deluxe-Tabs.com"></p>
</div>
2. var tabMode=1;
You can assign only links in this mode.
You should create top level items with subitems.
["XP Tab 1","", "", "", "", "", "", "", "", ],
["|Link 1_1","http://deluxe-tabs.com", "", "", "", "", "0", "", "", ],
["|Link 1_2","testlink.htm", "", "", "", "", "0", "", "", ],
["|Link 1_3","testlink.htm", "", "", "", "", "0", "", "", ],
["|Link 1_4","testlink.htm", "", "", "", "", "0", "", "", ],
["|Link 1_5","testlink.htm", "", "", "", "", "0", "", "", ],
["XP Tab 2","", "", "", "", "", "", "", "", ],
["|Link 2_1","testlink.htm", "", "", "", "", "0", "", "", ],
["|Link 2_2","testlink.htm", "", "", "", "", "0", "", "", ],
["|Link 2_3","testlink.htm", "", "", "", "", "0", "", "", ],
["|Link 2_4","testlink.htm", "", "", "", "", "0", "", "", ],
["|Link 2_5","testlink.htm", "", "", "", "", "0", "", "", ],
["XP Tab 3","", "", "", "", "", "", "", "", ], ["|Link 3_1","testlink.htm", "", "", "", "", "0", "", "", ],
["|Link 3_2","testlink.htm", "", "", "", "", "0", "", "", ],
["|Link 3_3","testlink.htm", "", "", "", "", "0", "", "", ],
["|Link 3_4","testlink.htm", "", "", "", "", "0", "", "", ],
["|Link 3_5","testlink.htm", "", "", "", "", "0", "", "", ],
You can use Object ID as well as Link in both modes. Use the following prefixes within item's link field:
"object:" - means that there is object id after it;
"link:" - means that there is a link after it.
"javascript:" - means that there is a javascript code after it, for
example:javascript:alert(\'Hello!\')
So, you should write for example:
["|Link 1_1","object:Content1_1", "", "", "", "", "0", "", "", ],