Recent Questions Html Tree Menus Tutorial
Q: Last, I couldn't solve the issue I meet when I set up a long name for an dhtml side menu item: next item overlaps. Is it possible to specify the width of an item?
A: You can try to use the following dhtml side menu parameters to use combinedbackground for your items:
var beforeItemImage = [,]; //left-side image for normal and mouse over state
var itemBackImage = [,]; //background or image for normal and mouse over state
var afterItemImage = [,]; //right-side image for normal and mouse over state
var beforeItemImageW = '';
var afterItemImageW = '';
var beforeItemImageH = '';
var afterItemImageH ='';
But you should create a small images in any Graph Editor, for example:
button_n_back.gif
button_n_left.gif
button_n_right.gif
button_o_back.gif
button_o_left.gif
button_o_right.gif
Q: It seems that if I try and use the syntax ["| with some HTML such as <DIV class = 'myclass'> inside dropdown menu it IGNORES the HTML and just treats it like another link.
But if I don't start the line with ["| ..... Then I get a syntax error.
For example:
I am trying to place 4 links in a square shape in the top left of my screen. To do this I was going to create DIV's and set the TOP and LEFT to different values from within a loop (I left out the code that does the updating for myleft and mytop...)
var menuItems = [
<loop>
["|<div style='position: absolute; left: <cfoutput>#myleft#</cfoutput>px; top: <cfoutput>#mytop#</cfoutput>px>'","", "", "", "", "", "", "", "", "", "",],
["|#ParentMenuDesc#","index.cfm?Workflow=#Workflow#&role=#Privilege_id#&cacheid=#createuuid()#&Process_Type=#Process_Type#&PageMode=#Process_Logic#", "#menu_option_icon#", "", "", "_top", "", "", "", "", "",],
["|</div>","", "", "", "", "", "", "", "", "", "",],
<end loop>
];
What am I doing wrong here?.... Can you show me how to accomplish this task?
A: No, this syntax is incorrect. It won't work.
var menuItems = [
<loop>
["|<div style='position: absolute; left: <cfoutput>#myleft#</cfoutput>px; top: <cfoutput>#mytop#</cfoutput>px>'","", "", "", "", "", "", "", "", "", "",],
["|#ParentMenuDesc#","index.cfm?Workflow=#Workflow#&role=#Privilege_id#&cacheid=#createuuid()#&Process_Type=#Process_Type#&PageMode=#Process_Logic#", "#menu_option_icon#", "","", "_top", "", "", "", "", "",],
["|</div>","", "", "", "", "", "", "", "", "", "",],<end loop>
];
You should have <div> ... </div> tags in each dropdown menu item!
It is not correctly to write <div> ... </div> tags for wholesubmenu.
var menuItems = [
["|<div style='position: absolute; left:<cfoutput>#myleft#</cfoutput>px; top: <cfoutput>#mytop#</cfoutput>px>text</div>'","", "", "", "", "", "", "", "", "", "",],
["|#ParentMenuDesc#","index.cfm?Workflow=#Workflow#&role=#Privilege_id#&cacheid=#createuuid()#&Process_Type=#Process_Type#&PageMode=#Process_Logic#", "#menu_option_icon#", "","", "_top", "", "", "", "", "",],
["| ","", "", "", "", "", "", "", "", "", "",],
];
Q: I have changed the font parameters for the menu, but it only seems to affect the dropdown parts, the main menu font doesn't change, and I would like them to be consistent. How do I fix this?
A: Please, make sure that you don't use Individual Item Styles for themain items. If you're using styles you should change font in thisstyles.
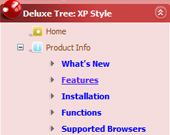
Q: The plus symbols (+) for Home, PRODUCT CATALOG, and Back are almost non visible and I can not find a parameter to move the collapsible tree menu to the right or to put a border on the left side.
A: You set the following style:
#menu TABLE {
PADDING-RIGHT: 0px; PADDING-LEFT: 0px; FONT-SIZE: 1em; PADDING-BOTTOM: 0px; MARGIN: -4px; PADDING-TOP: 0px; BORDER-COLLAPSE: collapse
}
You should delete
MARGIN: -4px;
style or set it:
MARGIN: -4px -4px -4px 0px;