Bootstrap Label Class
Overview
Being discussed earlier, within the web pages that we are making, we usually want featuring simple or more difficult forms to ask the visitor for a opinion, comments, some individual information or else preferences. We complete that featuring the appropriate controls within our forms thoroughly considering the form design and the precise controls which should be employed relating to the information we want and the particular circumstance involved-- like we just cannot have an order for a single colored phone case which in turn is both white and blue , a person can not be both male and female in gender or else a product need to be guided with numerous extensions that do not omit one another so clicking each one must provide it not excluding the others already picked. Sometimes, of course, we do require a precise email supplied or else a contact number which in turn needs to have the input that needs to comply with certain format in order to be correct and surely at particular circumstances we just need visitor's ideas on a topic the way they experience it-- in their own words.
For all of these types of situations we employ the suitable regulations-- like radio tabs, checkboxes, input sectors, message area components and so forth however there is definitely an crucial element bound to each one of these kinds of areas that helps make our forms pleasant and simply legible for the visitor to navigate through knowing in all times what is really wanted and effectively handling even the small commands like radio buttons and checkboxes. Specifically currently when the web changes into more and more mobile with pages displayed on different small sized screens this element is critical in granting efficiency and swiftness in completing our form.This element is a Bootstrap Label Button. ( useful reference)
Tips on how to apply the Bootstrap Label Input:
The things so far has been simply stated deal with the
<label><label>The system is quite simple-- just place a
<label>for =" ~ labeled form control ID ~ "for=""<label><label>Yet covering form commands in labels is rather difficulting the code and it is simply much better to leave out it-- additionally with the
for =""Additionally ordinary message within the
<label>Good example of form without any label
Should you receive no text message inside the
<label>aria-label
<div class="form-check">
  <label class="form-check-label">
    <input class="form-check-input" type="checkbox" id="blankCheckbox" value="option1" aria-label="...">
  </label>
</div>
<div class="form-check">
  <label class="form-check-label">
    <input class="form-check-input" type="radio" name="blankRadio" id="blankRadio1" value="option1" aria-label="...">
  </label>
</div>
Useful thing to note
Informative factor to keep in mind regarding labels within Bootstrap 4 in case that in the brand new edition of the framework this sort of element's styling has been really modified a little. The
<label>inline-blockFinal thoughts
So currently you realise exactly what the # elements are for and precisely how they operate in Bootstrap 4-- everything that's left is considering the proper form areas you need to connect them to.
Review a couple of youtube video short training regarding Bootstrap label
Related topics:
Operation of the label in in Bootstrap Forms: approved information
Bootstrap label tutorial
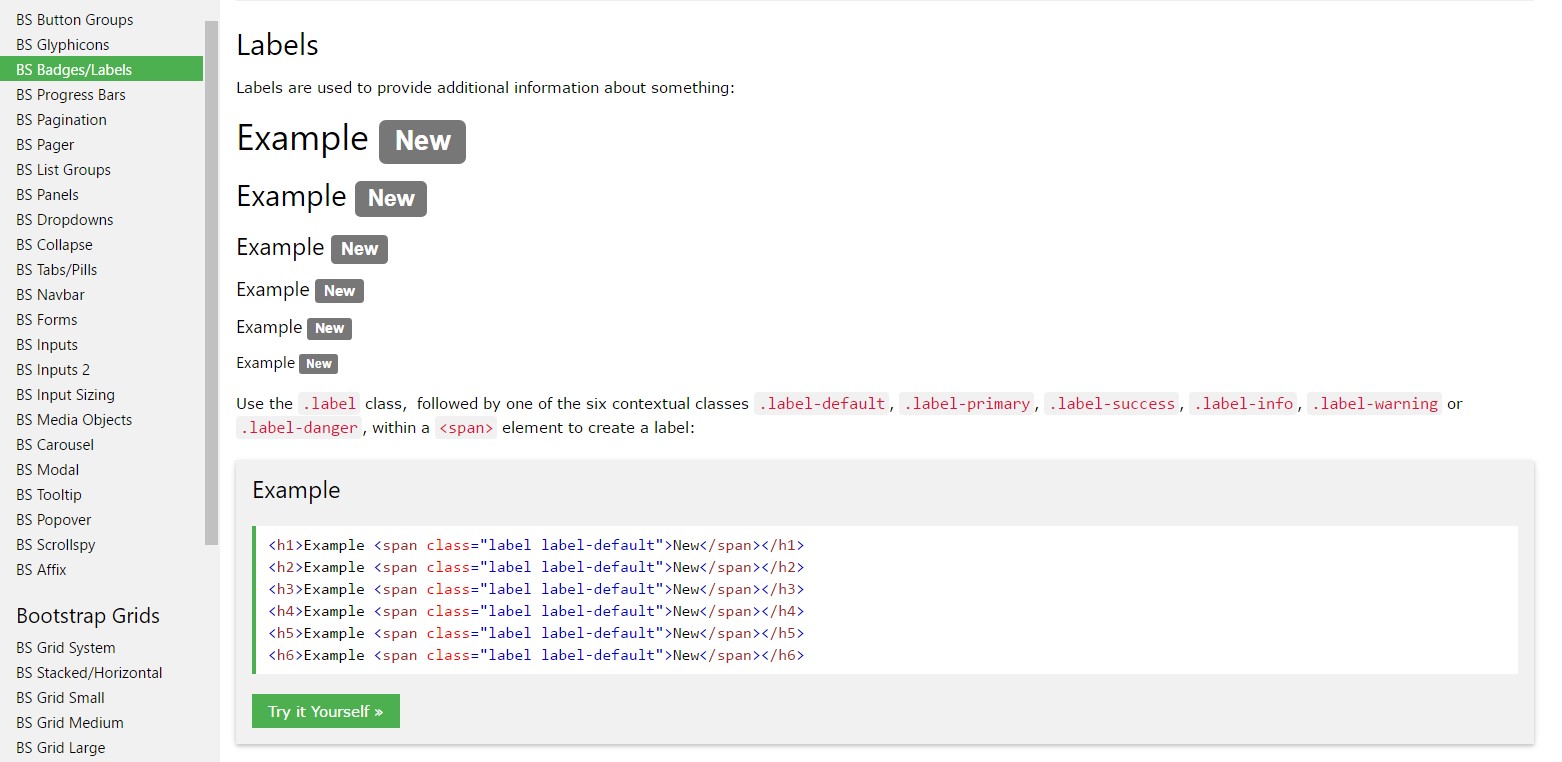
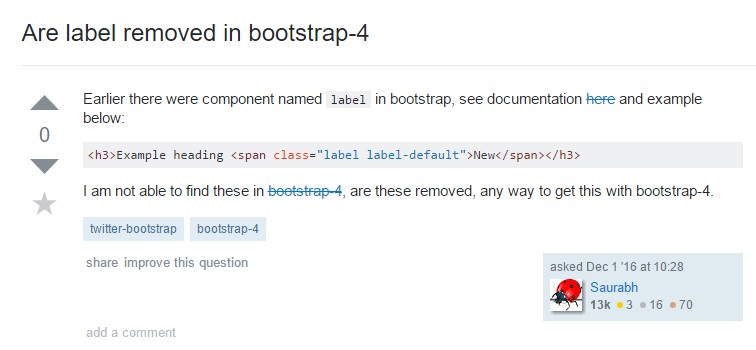
Getting rid of label in Bootstrap 4